I’ve been asked how to convert a PowerPoint to DVD, Flash, or PDF so many times by my co-workers that I am finally going to just write a tutorial on how to do it! There are many occasions when you don’t have access to a computer running Microsoft PowerPoint when giving a presentation and in those cases it might be easier to load a DVD, play a movie file like flash or show a PDF document off an iPad.
Converting a presentation to DVD is great because it’s playable on any DVD player in the world, whether it be a laptop, desktop, or stand-alone DVD player. Converting to PDF is good for those who want to send the presentation slides electronically, but don’t want people to be able to edit or modify the slides. Finally, converting to Flash or video is useful for those who want to embed the presentation on a web site or simply show it using media player software.
Converting to video is also a nice because you can then upload those videos to YouTube or Facebook for sharing. Converting to MP4 format will allow you to enjoy PowerPoint presentations on your smartphone, tablet or other mobile device! So let’s get into it.
Convert PowerPoint to PDF
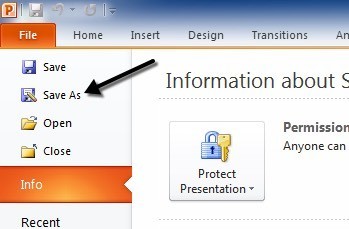
If you have the newer versions of Office installed, then there is a really simple way to get your presentations into PDF format. All you have to do is save the file and choose PDF for the file type. I’ve been using this method for a while and it converts your presentation exactly as is to a PDF doc. First, open your presentation and click on File and then Save As.
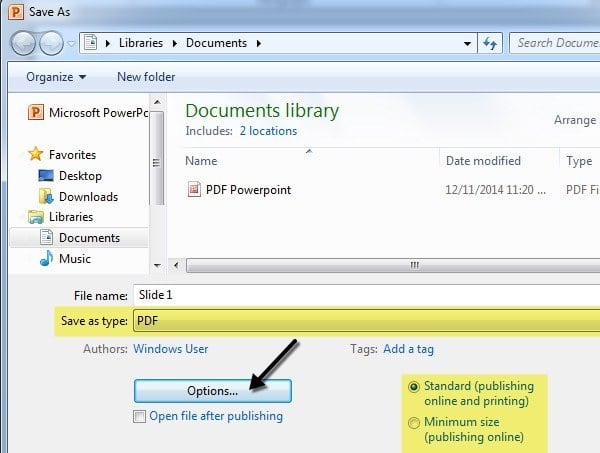
In the save as dialog, go ahead and choose PDF from the Save as type dropdown box. By default, it will be a standard size PDF, which means it can be used for printing or online publishing. If you want a smaller size PDF, choose Minimum size (online publishing).
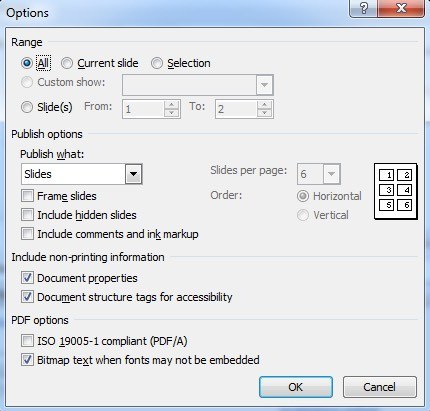
You can also click on the Options button and choose which slides you want to include in the PDF, whether to print the slides to PDF or the notes, handouts, or outline, whether to include comments, etc.
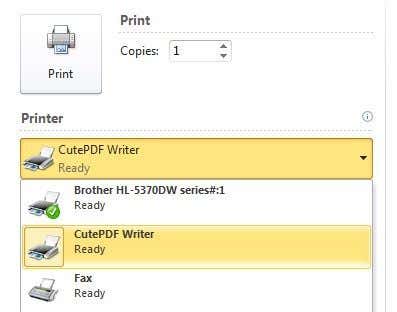
Click Save and you’ll now have a PDF document with all your PowerPoint slides. If you’re running an older version of Office and there is no option to save as PDF, then your only option is to print the presentation to PDF format using software like CutePDF Writer. CutePDF Writer allows you to create PDFs for anything that you can print.
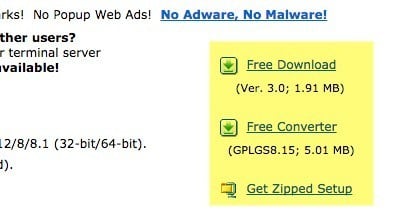
You’ll notice two links on the left side, one for free download and one for free converter, you need to download both and install them. You can also just click on Get Zipped Setup, which includes both files in compressed format. Now go to PowerPoint, open your presentation, choose Print, and choose CutePDF Writer from the drop down menu.
Convert PowerPoint to Flash or Video
If you’re looking for a free way to convert PowerPoint to video or flash, you have a couple of options. The first method is pretty much the same as how we saved our presentation to PDF format.
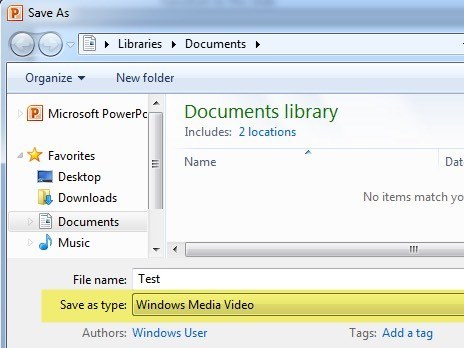
In the newer versions of Office, you can save your presentation with all transitions and animations as a Windows Media file. Using third-party software, you can then convert this to flash, MP4, or whatever video format you need. First open the presentation and make sure you review your slideshow and adjust the timings for the animations/transitions. Try to make it as automated as possible without the need for mouse clicks as those will automatically be converted in the video, but the duration will be a default value instead of something of your choice.
Next, click File, then Save as and choose Windows Media Video for the file type this time around.
Click Save and you now have a video of your presentation! I was quite impressed with the quality of the video and the almost 100% match to the actual presentation in PowerPoint in terms of slides, timings, animations, audio and transitions.
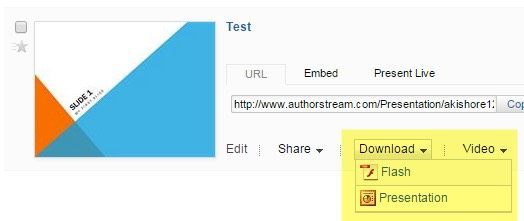
The second method involves taking a completed presentation and uploading it to a site calledAuthorStream. You have to sign up to use the service, but it’s free and definitely worth it. AuthorStream will also keep any audio recordings that you may have in the presentation.
Once you have it uploaded and it is converted, you will see a dropdown for Download and one for Video. Under download, you can convert the presentation to Flash and under video you can convert it to an MP4 video (up to 5 minutes for free).
In addition to AuthorStream, you can check out Slideshare, iSpring, and Zoho Show for getting flash versions of your PowerPoint presentation. You can then embed them into your blog or website.
If you want to convert the Windows Movie Video to another format, you can use online video conversion tools or third-party software like HandBrake. Feel free to read my previous post where I explain the concept of transcoding and video file formats.
Convert PowerPoint to DVD
Getting your PowerPoint presentation onto a DVD is also fairly simple once you get it into video format. So first you’ll have to follow the instructions above to get you video into any video format and then you can follow the directions to burn the video to DVD.
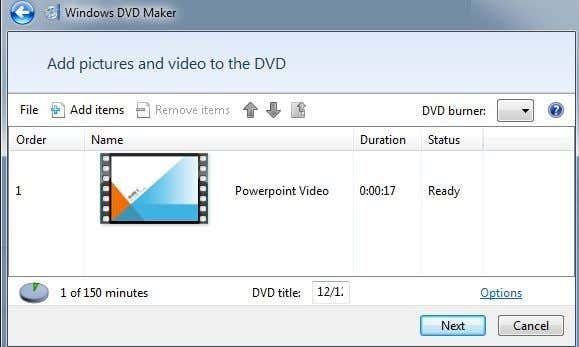
The easiest way to do this on Windows without any additional software is to use Windows DVD Maker, which is included with Windows Vista Home Premium/Ultimate and Windows 7 Home Premium/Professional/Ultimate. The software was removed in Windows 8 for no apparent reason. I’ll mention a third-party program below for Windows 8 users.
In Windows DVD Maker, first you have to choose the photos and videos that you want to include on the DVD. I just chose my short PowerPoint presentation and you can see it tells you how much time is left on the DVD and lets you change the title of the DVD.
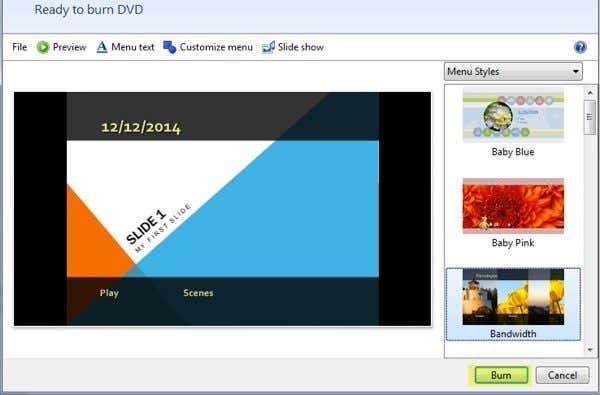
On the next screen, you can choose from different menu styles and you can also change the menu text, customize the menu and preview the menu. Go ahead and play around with the options and settings until you are happy with the results. For example, I got rid of Scenes because I only have one video on the DVD and it doesn’t make any sense.
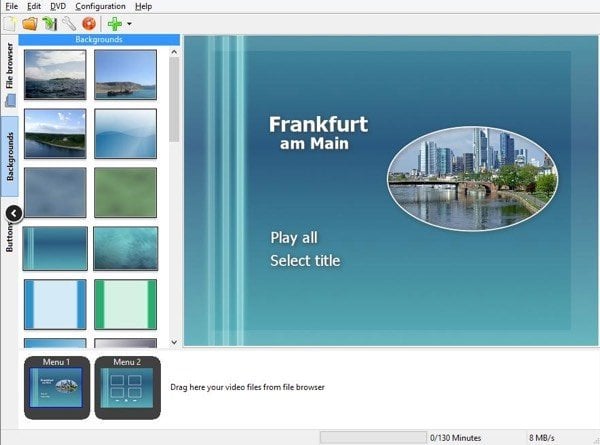
Pop in your DVD and then click Burn. You’ll have a nice looking playable DVD that can contain one or hundreds of PowerPoint presentations if you like! For those of you who don’t have Windows DVD Maker, you can check out a free program called DVDStyler.
I won’t go into detail here about how to use the program namely because it’s super simple to use, but also because they have enough support docs on their website. This program also has a lot more options than Windows DVD Maker, so it might be a better choice if you want more customization of your DVD.
That’s it! Hopefully, using the guides above you have been able to convert your PowerPoint presentation into the desired format! If you have any questions, post a comment. Enjoy!

Post a Comment